skip to main |
skip to sidebar
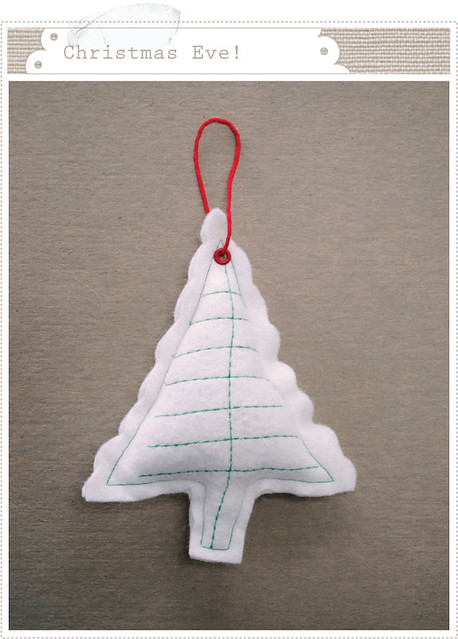
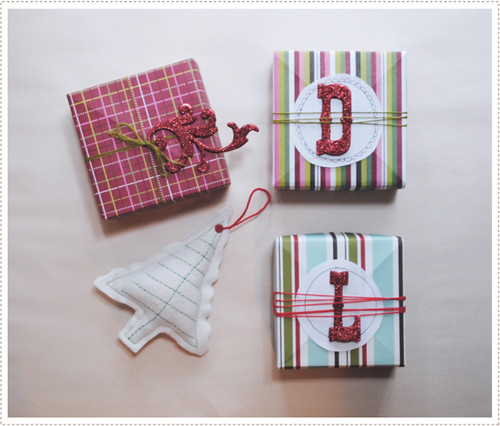
Here are a few other origami box ideas along with a simple tree ornament I gave out as a gift this year.
Wishing you all a Very Merry Christmas Eve while you are putting in It's a Wonderful Life and sipping peppermint hot chocolate as you wrap up all your last minute gifts for your loved ones. Hope your season continues to truly be merry and bright!
(Oh, and while you're gobbling up your Trader Joe treasures, be sure to check out Marigold's and A Creative Mint's bag wrapping ideas inspired by this post. So great!)
I can't believe there are only 5 days left until Christmas! Where has the time gone? Well, if you are like me and need a stress free (and fast!) treat idea for friends and family, look no further.
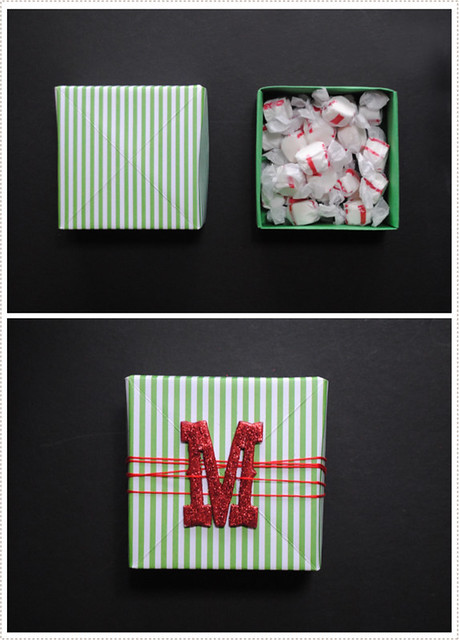
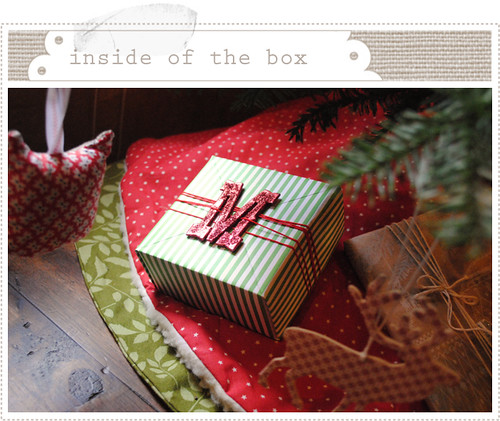
These super simple origami boxes filled with some delicious goodies are just thing to put a smile on their faces. And if you are more on the ball then I am, fill them with scrumptious confections straight from your kitchen. Otherwise, find some store bought delectables, add a bit of holiday trimming, and you are all set!
Now on to that sewing, wrapping, and last minute shopping I've got to do!
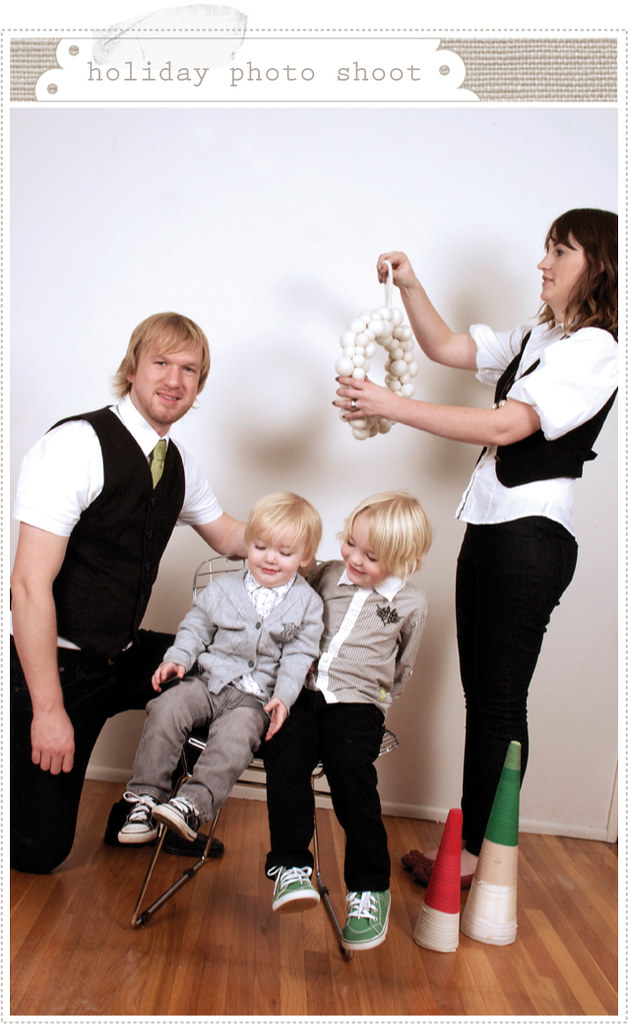
Good times were had at our family Christmas card photo shoot this year...and, thanks to the ever fabulous Jordan, the pics turned out great too! I'm a little late on the family and friend Christmas card front this year but I'm happy to report that we have little A's teacher cards completed and sent out (check that off the list!).
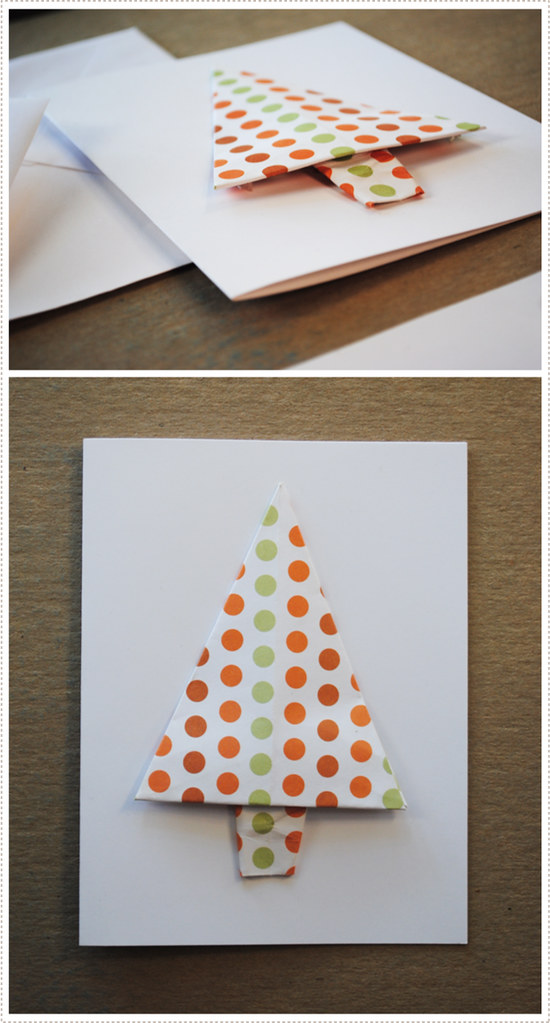
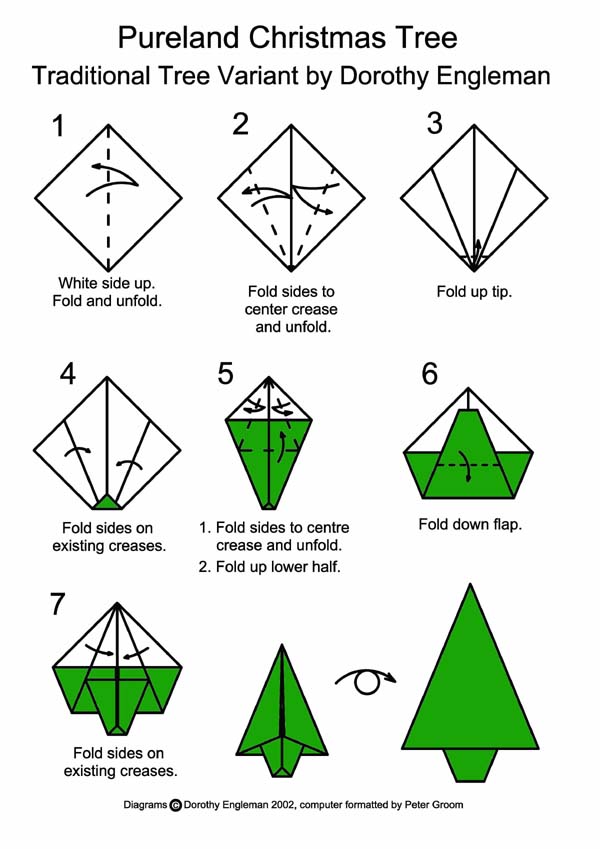
We went with simple origami Christmas trees made from pattered paper which we then adhered to blank white cards . Little A signed them and then we topped it of with possibly the best photo from the family shoot...
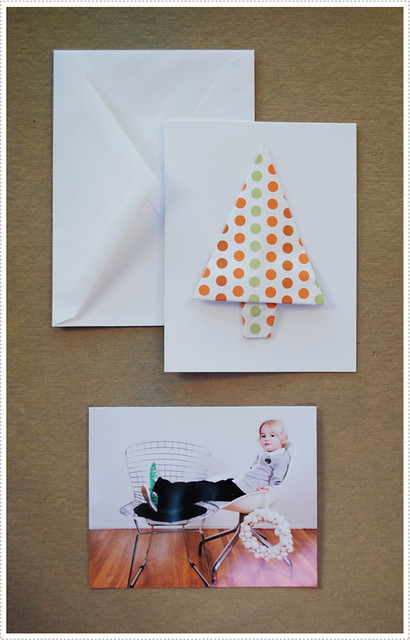
...that of Little A lounging with his feet up, chillin' on our chairs, hanging onto the Christmas wreath... Knowing his personality, his teachers will be sure to get a kick out of it.
Now on to the rest of my Christmas cards! (If only I was ambitious enough to do origami trees for all of these...)
(oh and I'll share more from the photo shoot later...after I've got my Christmas cards out :)).
I've been trying to slow things down a little bit this year in an effort to make the most of the Christmas season and the priceless time I have with my little guys while they are young. It's really been great (if not a little bit hard) to let go of some things and just let the season sink in. As always I have a kagillion ideas for Christmas starting Dec. 1st and just want to run with them, i.e. - handmade ornaments, super fantastic handmade gifts for the boys, friends all my extended family, a gorgeously decorated home, delicious treats and goodies for all, you know, the list goes on (and on top of that, it's also a really busy time of year for illustration and my etsy shop...). While doing this stuff can definitely get me into the Christmas spirit, it can also stress me out if not kept in check. This year I really want to be sure to reflect, serve and really feel the Peace of the season. So we are keeping it simple.
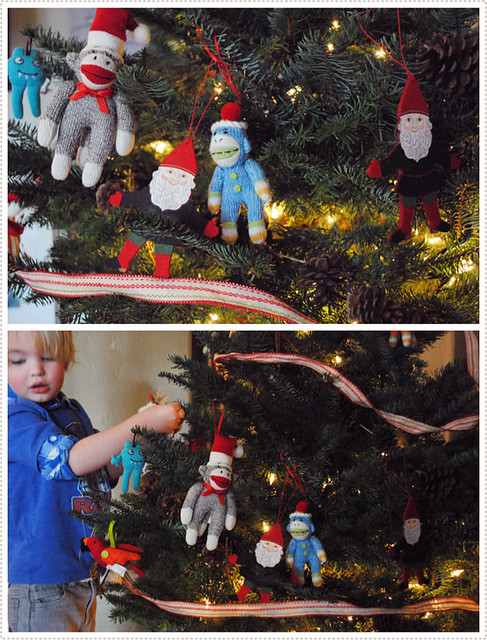
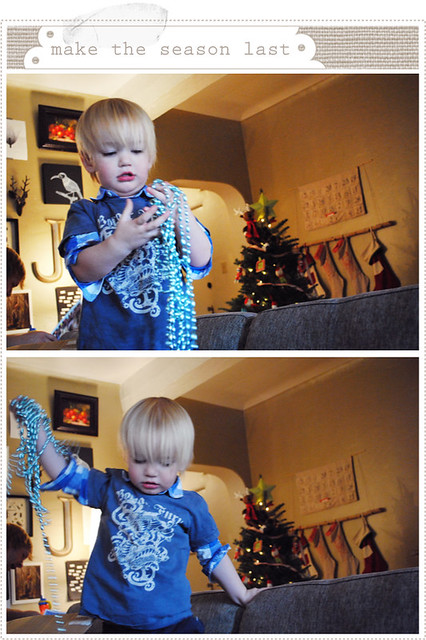
I started this by letting go of the idea of creating a new, perfectly decorated tree and just let the kids go for it. It turned out to be a magical afternoon full of joy and merriment. Little A was ready to put the tree up just as soon as we got back from our Thanksgiving travels so we headed over to our local lot. The Christmas spirit must have been in the air because the kind salesman offered to let us name our price (he must have noticed our gawking stares when he told us just how much this little squatty tree originally went for). He then proceeded to pull out some santa hats for the boys so that our picture taking could be more festive. We were very thankful for his kind spirit which really set the mood for the rest of the day. (Which helps when I think of how my iphone was set down and then most likely swiped at IKEA yesterday...yeah I know, sad story).
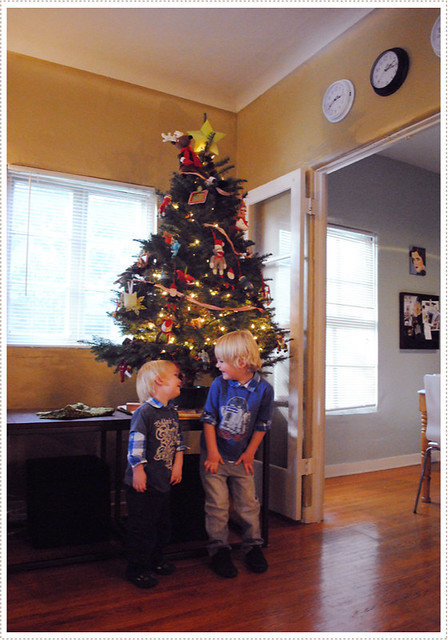
The boys were very happy with their work and the Christmas spirit began to resonate throughout our home. Can I just say I love this time of year! Little O is walking around singing Jingle Bells and Little A is trying to figure out how Santa is supposed to get to our house if we don't have a chimney (he doesn't like the idea of him using the door...just doesn't seem right I guess).
And don't worry, I still have a few creative ideas I want to share, and you can hop on over to Giverslog to see what I'd slip into santa's sleigh for all of you if I could. Hope your season is feeling merry and bright!
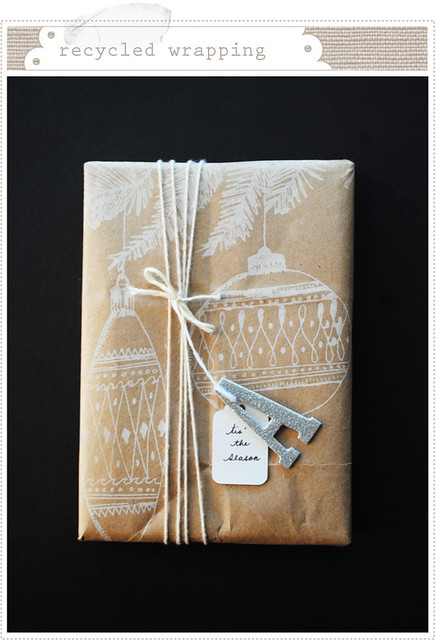
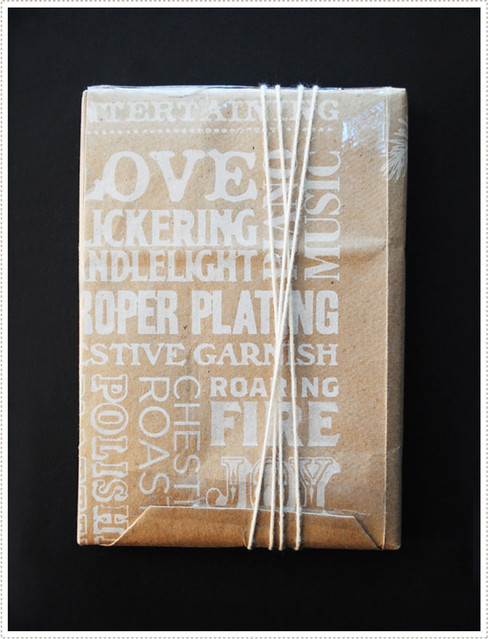
If you are lucky enough to live by a Trader Joe's, or in my case right across the street from one (far too dangerously close to those Candy Cane Joe's Joe's!!), then you probably have seen their fantastic holiday paper bags. When Jon came home with a few the other night I couldn't help but swoon over the marvelous, whimsical illustrations that adorned their bags. Being a lover of brown paper, a fan of great art and design and an advocate for reusing great shopping bags I knew at once I had something here - beautiful wrapping paper right at my finger tips...and the best part...it was totally free! 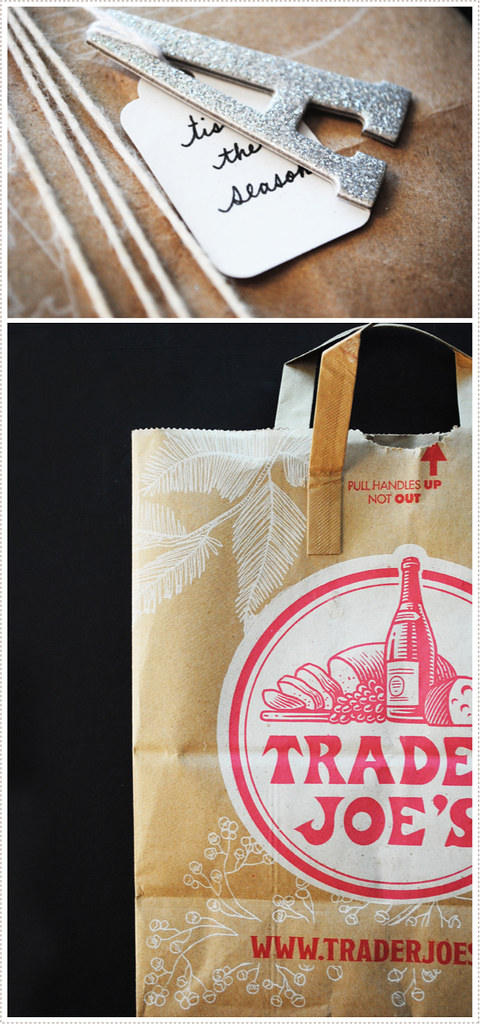 After trying to do a search for the illustrator hired to do such lovely drawings, I soon discovered that I was really behind the times. Apparently Trader Joe's has had this same bag design since at least 2008 when the creative Katie Chambers of Ink&Post reused these bags and made some pretty fantastic DIY labels (which Design Sponge even covered...hello...where have I been?). I have to say, these are way cooler than my simple idea of wrapping paper...Thanks Katie for the inspiration (even if I am 2 years late!).  Oh, and I still haven't been able to find out who the illustrator/designer was on these so if anyone knows, pass it along.
Happy Re-giftwrapping!
 Hello friends! Hope you all had a wonderful Thanksgiving weekend and scored on a lot of great Black Friday deals (I actually got up at 4 AM this year for the first time and hit the shops with my sister! It was a blast!). But isn't it great that the sales don't stop there. I love this cyber Monday thing! So, just like last year, and in the spirit of it all I'm offering a free print with every print (or original portrait) purchase you make in my Etsy shop here. When you check out just enter promo code: CYBERSALE along with which print you want to have for free and I'll ship them off to you! Hello friends! Hope you all had a wonderful Thanksgiving weekend and scored on a lot of great Black Friday deals (I actually got up at 4 AM this year for the first time and hit the shops with my sister! It was a blast!). But isn't it great that the sales don't stop there. I love this cyber Monday thing! So, just like last year, and in the spirit of it all I'm offering a free print with every print (or original portrait) purchase you make in my Etsy shop here. When you check out just enter promo code: CYBERSALE along with which print you want to have for free and I'll ship them off to you!
Happy cyber shopping!
(I'm on the road today, trying to get out of the Colorado and Utah snow back to sunny California! I'll try to keep the shop stocked as much as possible but if you see a print that you want that is not available when you want it, just convo me and I'll be sure you get it for the sale price).

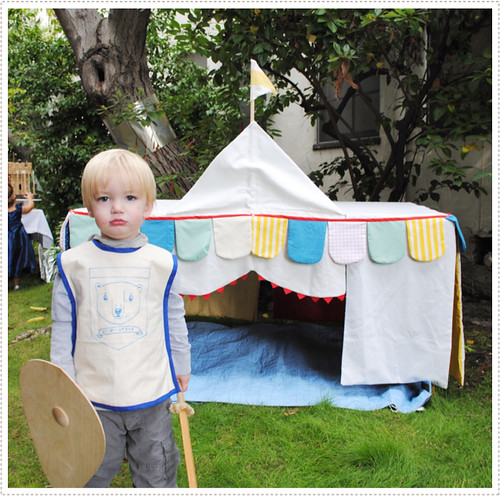
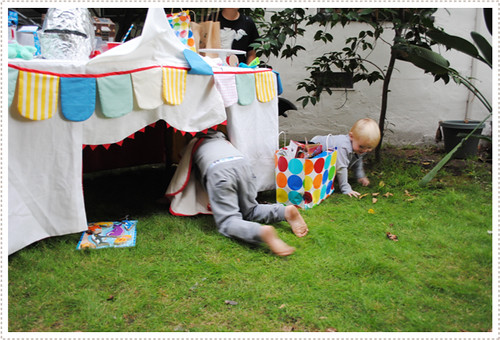
Little O (formally know as Baby O...sigh...) recently turned two and we threw him a little Knights and Nobles birthday party, to coincide with his Halloween costume. With his b-day so close to Halloween we found that we need to either throw him a Halloween bash or a themed party based on his costume to make things easier during the holiday season. In fact, with how much I love to put together a party, and juggling between two boys, it became necessary to instill a new birthday tradition for our family. We will now rotate every year between a fun themed party with friends and a more low key, but equally exciting and special, day out with the family. This year was Little O's first big bash with friends.
I had seen a sort of table tent a while back that I had fallen in love with and had wanted to make one for the boys ever since. I finally got to it this year and it was perfect for the occasion.
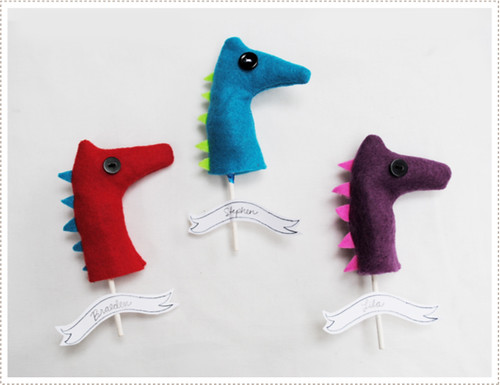
I then made little dragon finger puppets as favors (I know, they look like horses...) popped a sucker inside, attached a name to each and hid them throughout the yard so that the littles could go on a dragon hunt and find their special dragon.
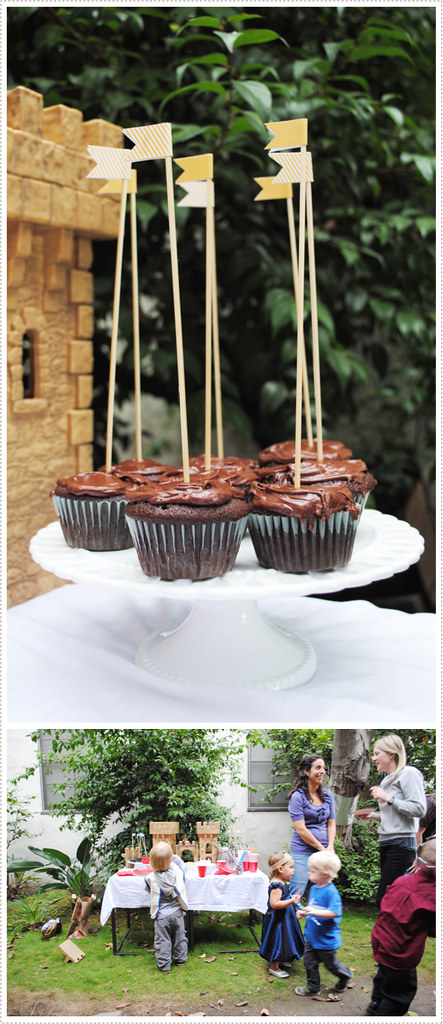
I had grand plans to make a cake but it sunk after coming out of the oven an hour before the party (I tried to make a really tall one...I guess that's what I get for trying to side step the multi-layer technique...) and so I quickly made some chocolate cupcakes instead which ended up working out perfectly.
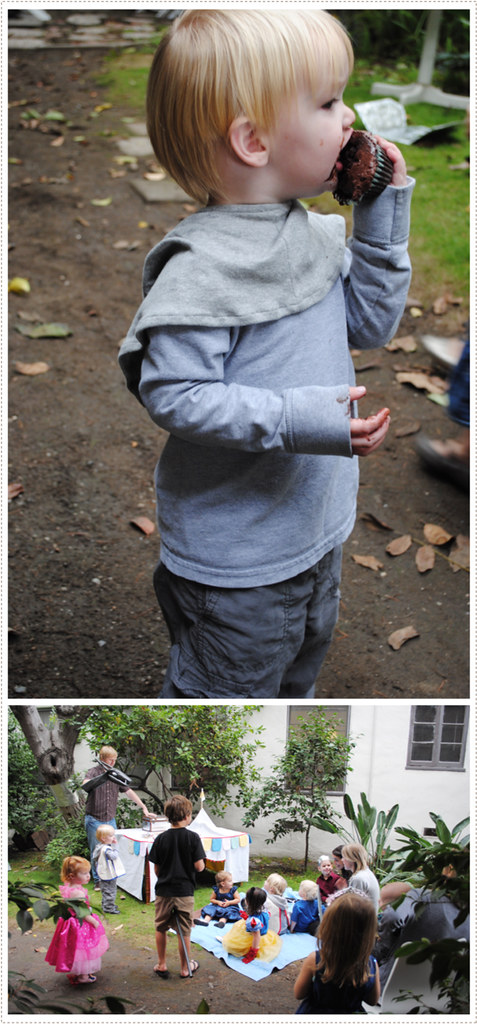
We threw together a simple spread fit for a two year old - string cheese, crackers, grapes, juice and red vines - which were a great, drooly, messy hit with the little darlings (as if the chocolate cupcakes weren't messy enough!). And of course we brought out the boys Schleich castle and knights for decor/playing/what have you.
The highlight of the party (besides seeing all the little princes, princesses, knights, etc. in their garb) was Jon's puppet show he put on with his very own handmade dragon puppet (which I was super impressed with).
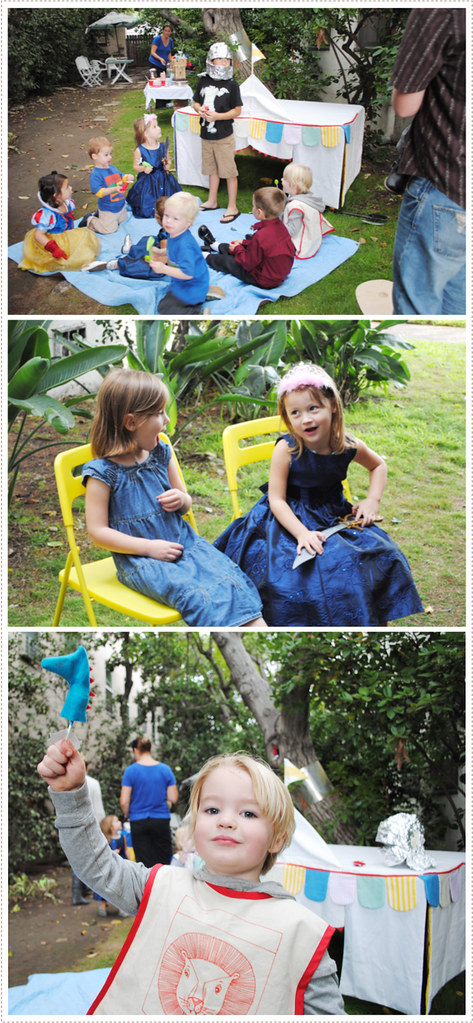
I'm pretty sure it was a big hit with all the littles as well - who proceeded to take turns puppeteering themselves with the coveted dragon and putting on performances.
Great fun was had by all. The rain stopped just in time for the event and I couldn't be happier with how it all turned out.
Happy birthday my little baby!
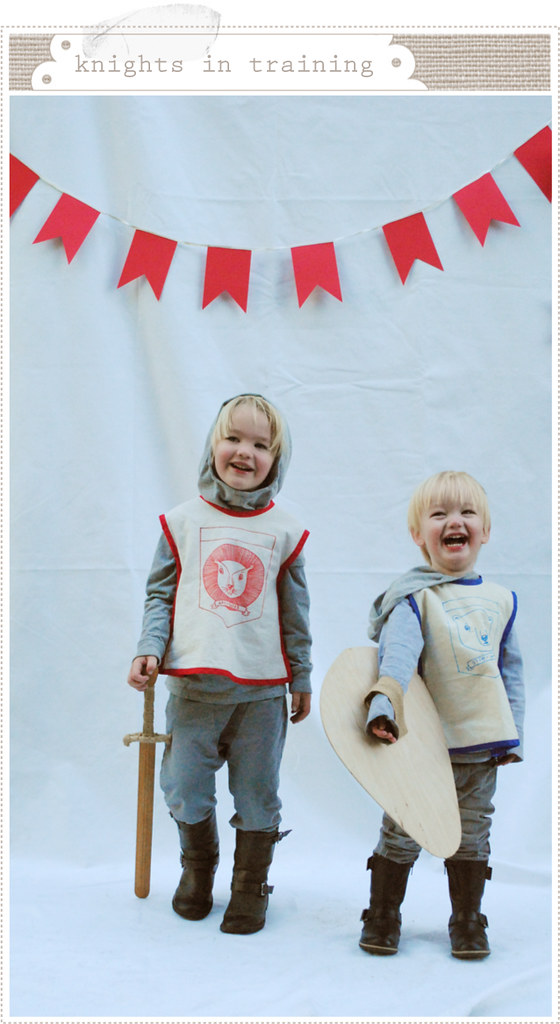
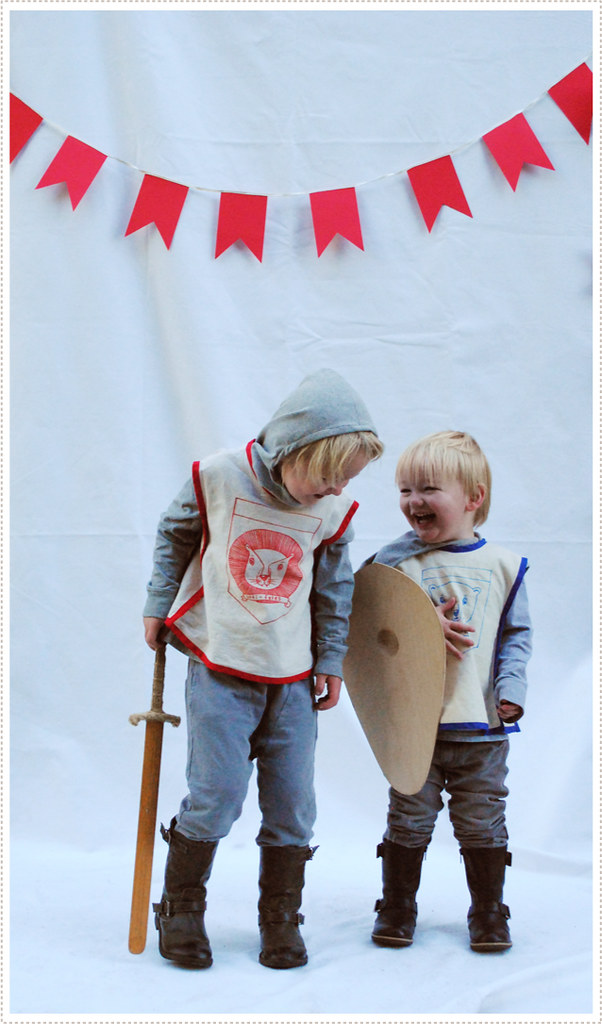
Knights, King Arthur, castles, dragons, etc....they are all a big deal at our house. In fact we keep the boys from fighting over their medieval acquisitions by giving all red knight paraphernalia to Little A and all things blue knight go to Little O. So it only seemed fitting that for this years tricks-or-treats the boys dress up as their attributed red and blue colored knights. Jon had purchased this wonderful wooden sword and shield set in London way back when I was pregnant with Little A (I guess we know where this affinity for knights comes from). I was at first sad that we didn't have a second set for Little O but, as my mother pointed out, it was probably a good thing as too much real sword fighting would probably be going on. 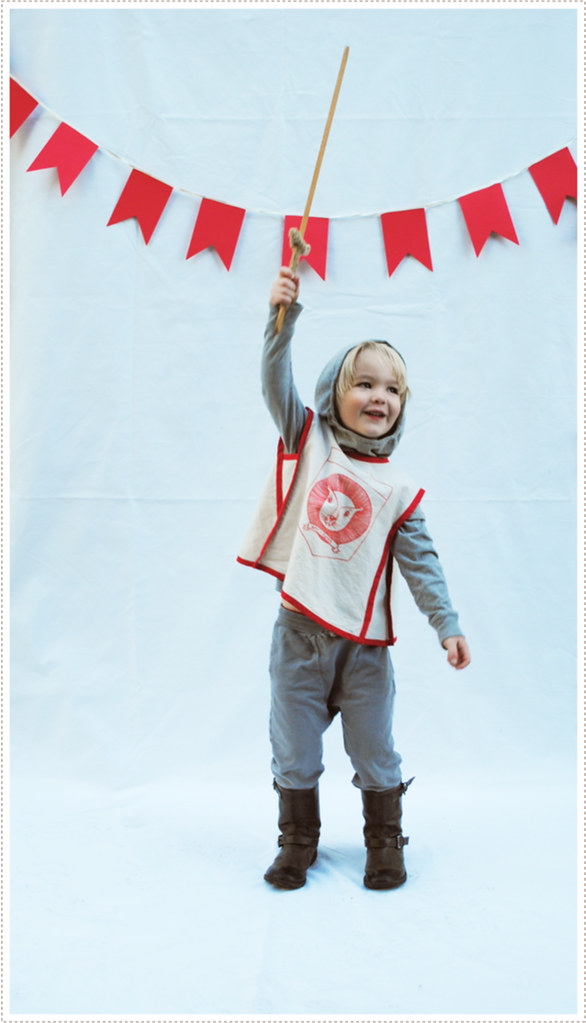 The costumes were pretty simple to make and put together. I sewed both the boys coverlets using a vintage 70's art smock pattern and then hand drew (with fabric markers of course) shields with the boys attributed animals within (yes, we have a lot of identifying going in our house: colors, animals, you name it...we like themes I guess. Little O is the bear and Little A is the cat (and in this case, a Big Cat, or a lion).) 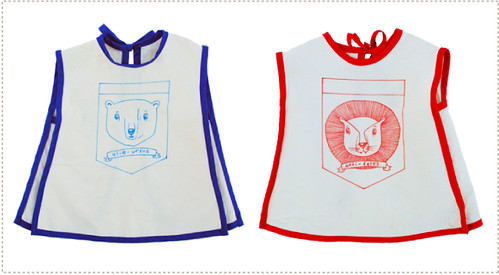 I sewed the hoods from a knight pattern that I already happened to have (and as you can see, Little O was not about to put his on) and then I just found grey shirts and pants to put on underneath. The hardest part of the costume was actually finding the boots. I found Little A's pair at Marshalls a while back but they didn't come in Little's O size so I was on the hunt for some time. I finally checked in at Target right before Halloween and they had the perfect black boots in Little O's size. Score!  Jon went as Robin Hood this year (he made his own bow and arrows and they were incredible!) and I was of course the medieval white cloaked ghost? or Maid Marion? or?... 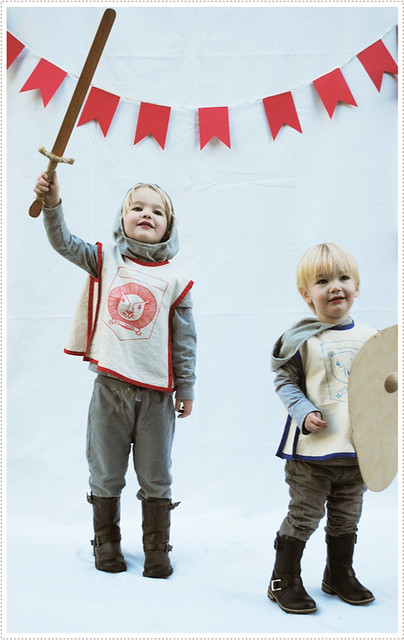 Needless to say the boys loved every minute of it. The costumes, the imaginative play, the trick-or-treating, the candy eating...all of it!
(oh and in case you are wondering, I used the back side of the Halloween backdrop for this little photo shoot. So handy!).
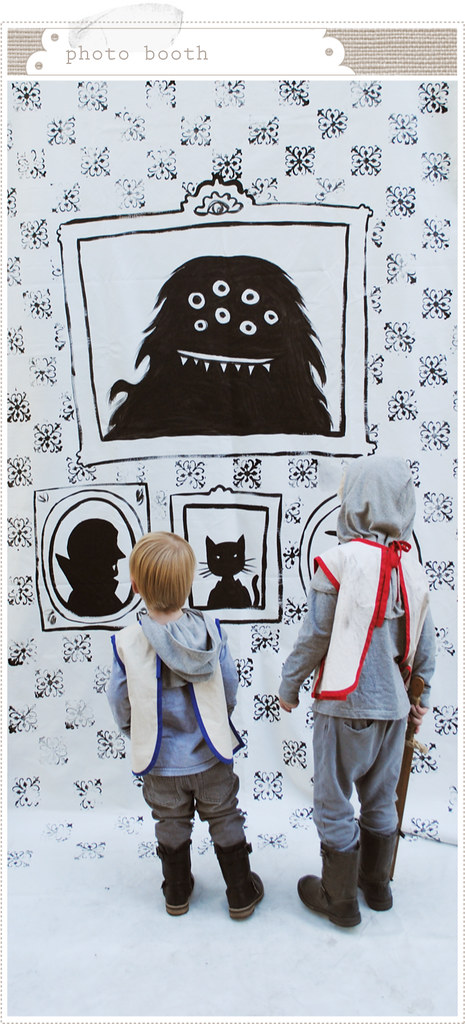
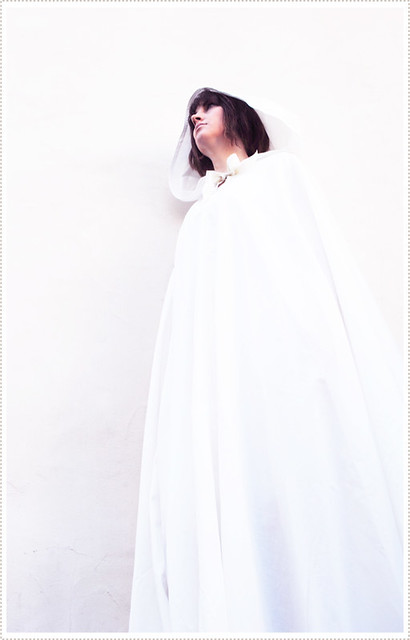
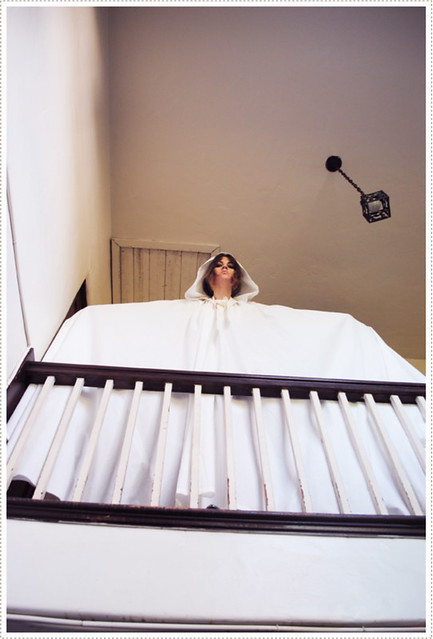
I was asked to put together a Halloween photo booth for a trunk-or-treat after-party at our church this year. Being a fan of the photo booth movement, I was of course totally on board. I had grand plans for this but as the clocked ticked closer and closer to Halloween time seemed to melt away and the day of the trunk-or-treat arrived all too quickly. Using all of my available sheets for this ghost costume I was in need of a white back drop so I raced over to JoAnn's, the morning of, and managed to luck out with some great white vinyl home decor fabric on sale for $2.99 a yard! I gobbled up about 4 yards, grabbed a few sheets of black poster board and some wooden dowels and headed straight for the check out.
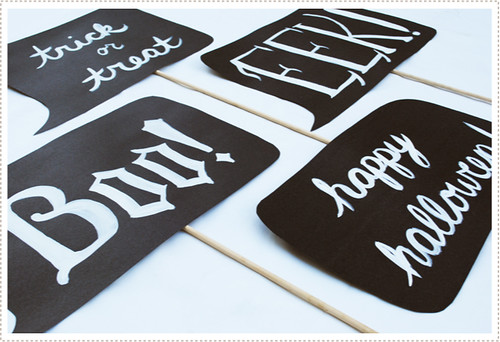
Upon arriving home, I got to work straight away. Jon helped me by finding some great font inspiration for the speech bubbles and called up a friend with photo backdrop equipment so that we could hang this thing. I quickly painted some spooky silhouettes in decorative frames, using both black craft acrylic paint and black tempera paint (the only kind of paint I had on hand for this). I then found an old rubber stamp and began stamping a wallpaper look behind the frames (with proper planning you could do this a lot better than I did and actually put the background pattern on before painting the frames...just a thought...) 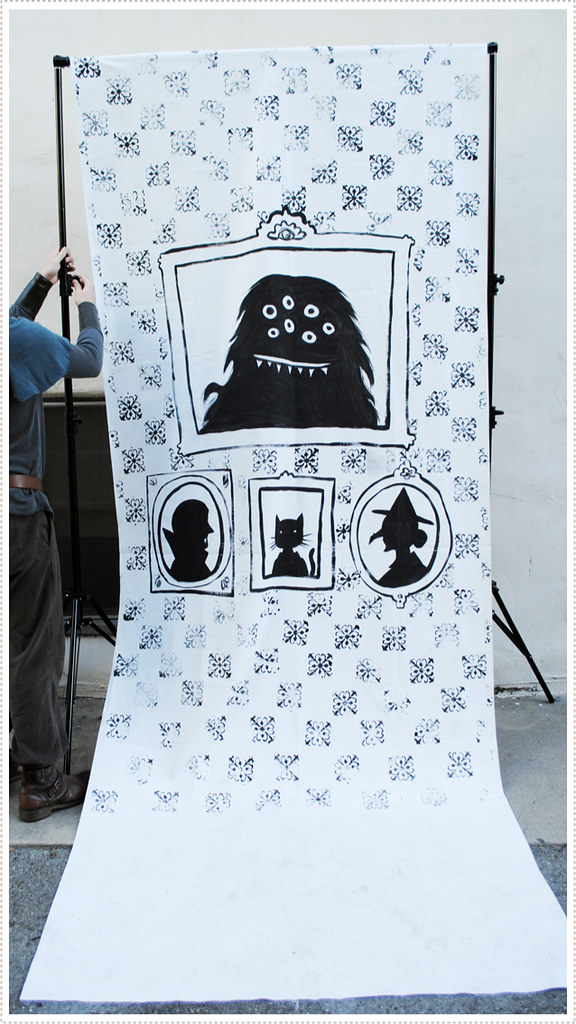 It was hard to keep the Littles feet from dancing all over this but I somehow managed to get it finished just in the nick of time (just don't look too close!). Little A was delighted to see each scary creation come to life in the frames. His favorites were the googily eyed monster and Dracula (whom I was surprised to find him familiar with...)  While letting the backdrop dry I popped in Charlie Brown's - Great Pumpkin Halloween movie, to keep little feet from tromping all over everything, and I began work on the speech bubbles. I used some of Jon's font choices for "BOO!" and "EEK!" and just hand lettered the other titles. Little A was very excited to be able to read "EEK!" and "BOO!" so these speech bubbles naturally became his personal favorites. 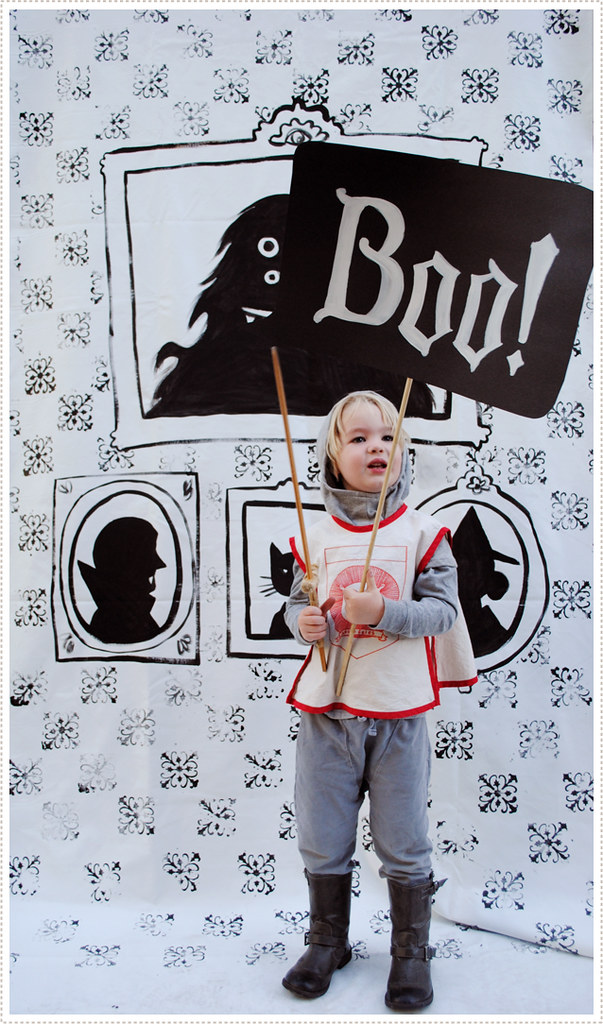 We made it to the trunk-or-treat a little late, pulling up just in time to see a portrait of a queen come to life and suddenly reach through her frame to deliver candy to the startled trunk-or-treaters (totally awesome). Jon took the littles around the parking lot for round one while I went on into the gym to set up the photo both. Phew! I somehow managed to put it together with enough time to do a second round of trunk-or-treating with the boys. 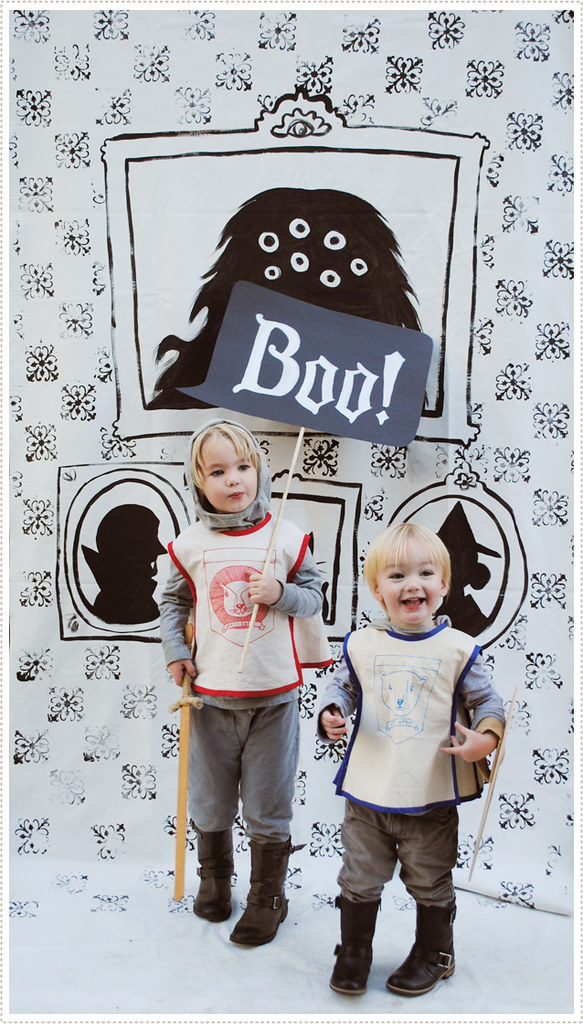 When it was time to close up trunk we all headed indoors for donuts, homemade root beer, pumpkin bowling, pin the mouth on the bat, Halloween fishing and of course costumed photo shoots. All in all I think it worked out...and can I just say...so glad to have this all ready for next year!

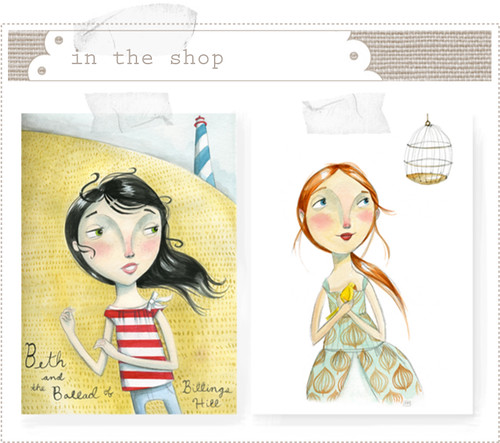
Hello friends! I'm so excited to share with you the fabulous holiday online magazine, Gifted, that the extraordinary Ez, of Creature Comforts blog, has put together just in time for us to start thinking about our 2010 holiday gift giving. She was so kind to invite me to be apart of the incredible line up of interviews which focus on everything from favorite holiday songs to how to stay sane during the hustle and bustle of the season. To read my, and many other incredible bloggers, thoughts on the holiday season, hop on over to Gifted now!
There are also several DIY tutorials and incredible gift round ups that you won't want to miss. Thanks EZ so much for for putting this gem together! I already feel on top of things this year thanks to this amazing publication.
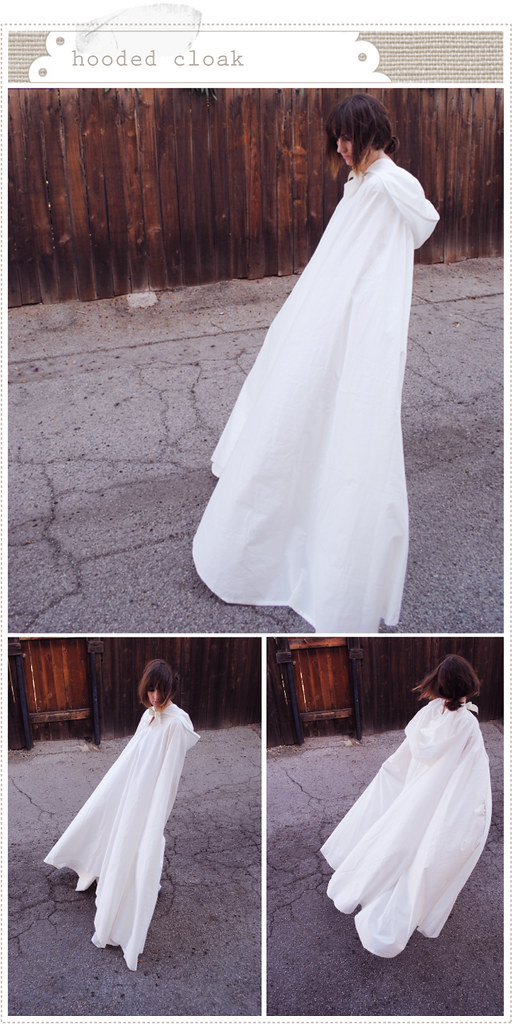
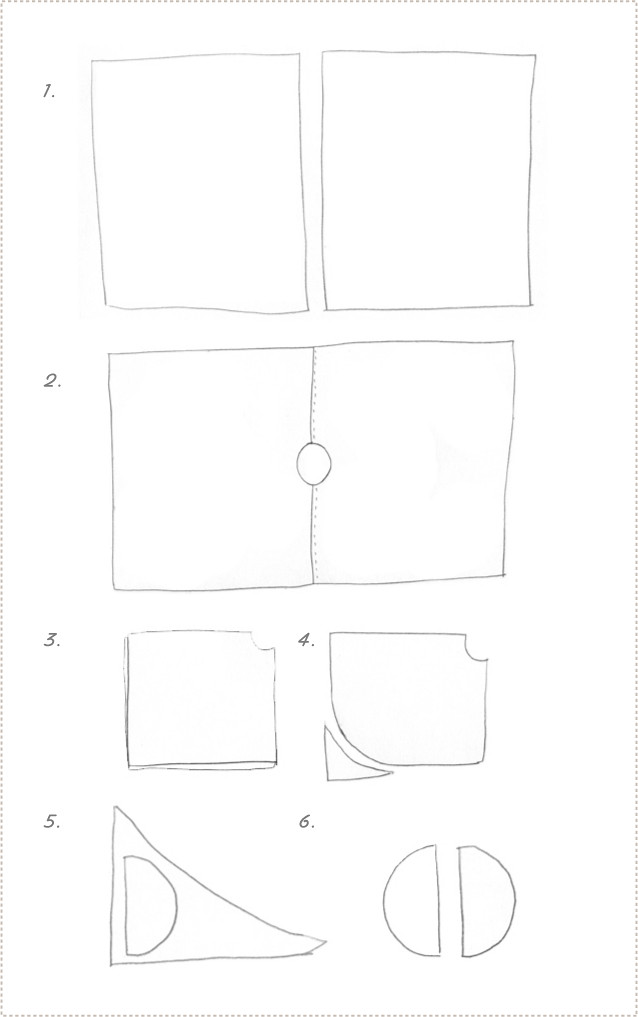
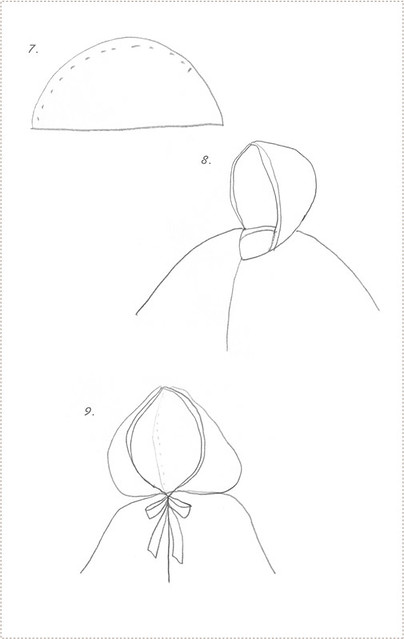
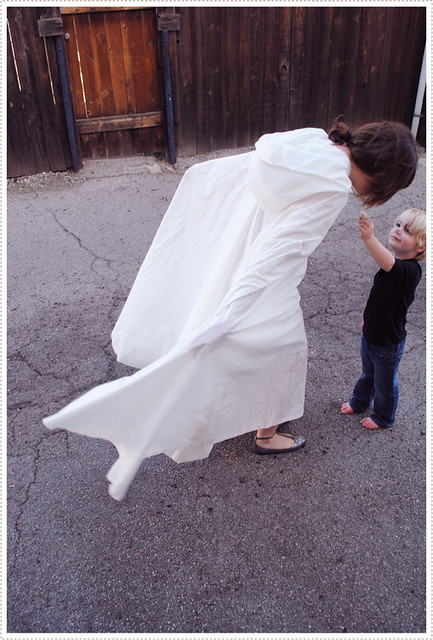
If you're like me and are slightly manic about what you want to be for Halloween (Frida Kahlo? Liz Lemon from 30 Rock? Cool spooky ghost?) and have been waiting up to the very the last minute to put something together, well you're in luck. With this simple hooded cloak ghost costume (made from two twin sheets) you'll be haunting the halls in no time! Step 1. Grab two white twin sheets (I purchased mine from Ikea). Step 2. Sew them together length wise. Cut out a head hole in the very center of both sheets (or do like I did and just seam rip the center stitches until your head can fit through and you are comfortable with the size of the hole). Step 3. Fold fabric in fourths so that the head hole is in upper right hand corner. Step 4. Trim corner opposite of head hole, rounding out the base of the cloak. Steps 5 & 6. Using remaining, trimmed fabric, cut two semicircles for hood (you can measure from the high forehead to the base of your neck and then add 3 inches of ease of just eye it based on how large you want it to be). Step 7. Sew semicircles together stoping about two thirds of the way through (this will be the neck area where you will attach the cloak). Hem edges of hood. Step 8. Sew hood onto cloak at the neck hole - leaving a bit of room at the base of the neck for tie. Step 9. Sew ribbons on to each side of the neck hole at the base of the hood for tie. Place your costume on, add a bit of ghoulish make up and let the haunting begin! This concludes our 5 full days of Halloween marathon! I hope you have been frightfully inspired.
Happy haunting this Halloween weekend!!

For day four, of our five days of Halloween, I bring you an oldie but goodie - paper snowflake pumpkins! Making these fun and festive paper decorations has become an annual family favorite for us. So gather around your little ghouls, grab your scissors, decorative papers and loads of imagination and your sure to have frightful, delightful time crafting each unique and surprising spooky face!
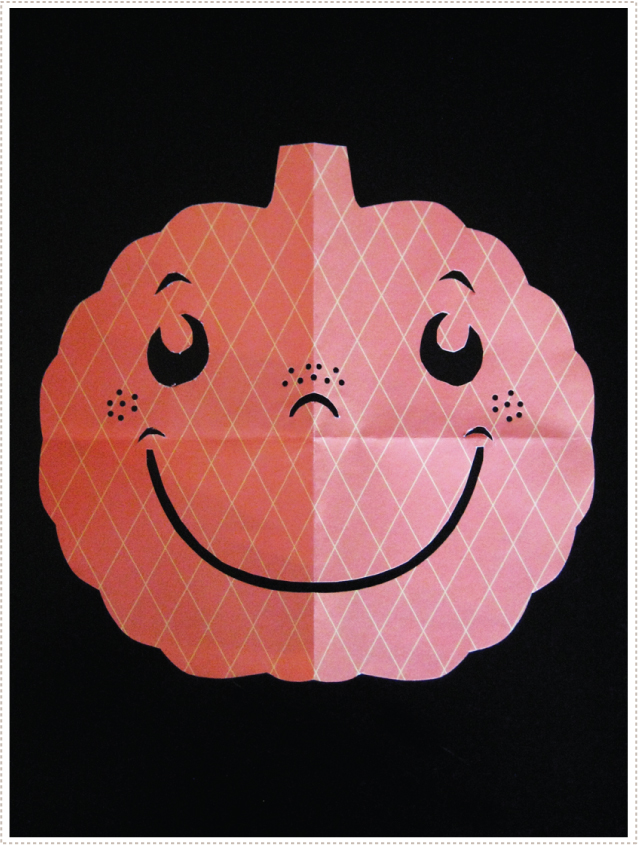 For how-to instructions, click here.
And for a few more Halloween oldie's but goodies click here and here.

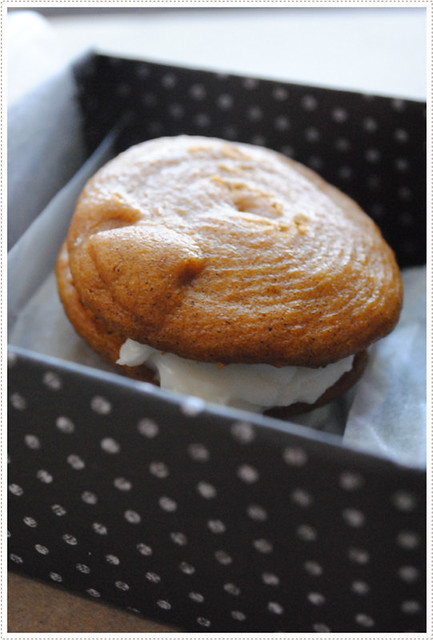
Jon and I have been stuffing our selves silly on some pretty fantastic pumpkin cream pies (also know as pumpkin whoopie pies) and we've been loving every bite of it. But what's Halloween if not a time to share our sugary loot with others?
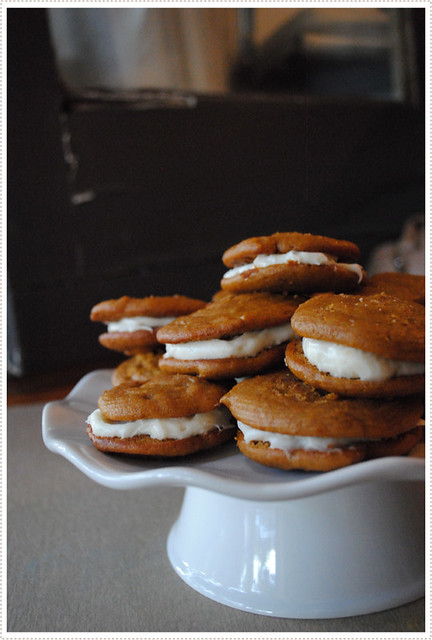
So I got to work putting together some origami treat boxes (using my sister's fab tutorial here) so that we could share our baking delights with those we so hauntingly adore. These boxes are deceptively simple to make and quite addictive (... almost as addictive as these cookies!). For the boxes I used 12"x12" scrap book paper but, as my little sis frequently does, you can use wallpaper- or really just about any paper that has a stiffness to it. Add a bit of wax paper, a couple of cookies and you're set. 
|


